QAL – (Faux) Chenille - Applique.
This is yet another application for Chenille –it makes a
lovely outline for your appliqué. This
is great for baby quilts as it creates a really tactile quilt which babies love
to play on.
Today we will work on making this cot quilt.
What you need to start:
·
Fabric scraps to for your appliqué shapes
·
Larger fabric squares for your chenille strips
(contrasting fabrics work best)
·
Vliesoflix or double sided fusible webbing
·
Thread
(neutral or strong contrast to top fabric)
·
Scissors
·
Temp. Marking pens/pencils
·
Ruler
(I used a lot of my scraps to make this quilt. The background squares are 10.5" so they will finish at 10".)
I drew some simple shapes on paper and then traced it on double sided fusible webbing. I then fused this onto the background blocks as below.
Outline your applique shapes with a line of stitching close to the edge (raw edge applique). This holds the fabric in place. You don’t have to be overly accurate.
Take
your chenille fabric and fold it diagonally and then give it a light press.
As with the previous Faux Chenille tutorial, mark out your lines ½” from the folded edge of
the fabric. Do this for all the chenille fabric squares.
You don’t need to mark out the whole width of the fabric, just a few rows to
give you enough chenille strips. Sew these
lines as with the previous Chenlle QAL.
Now you will need to cut out your chenille strips. I use the
sewn line as my mark to make sure that I cut 1/4” from the edge of the sewn
line. (You will be slicing off the folded edge).
Cut a few
strips from each fabric.
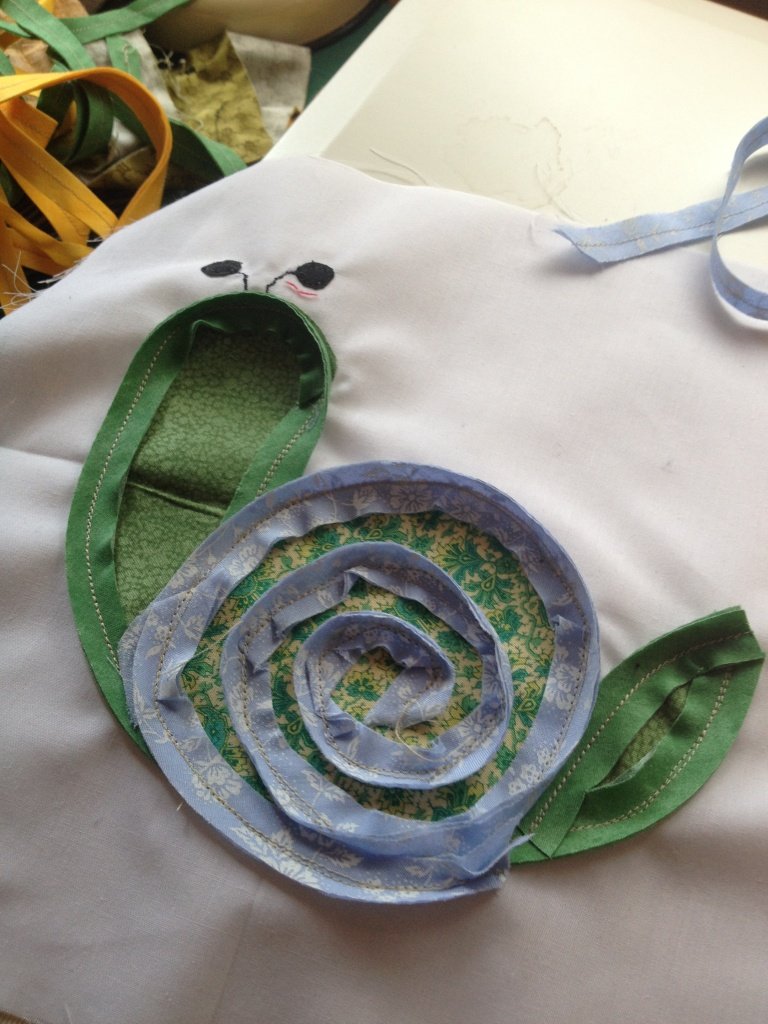
Now sew these strips onto the edge of your applique shapes.
NOTE: I did all the embroidery for the antennae and lady bug 'spots' before I attached the chenille strips. I did this so that the edges of the embroidery would be under the chenille strips - just a personal preference - you don't need to do this.
Make sure you have sufficient overlap on the start and end of the strip. This also applies if you were using smaller bits of chenille strips. Pay attention to the strips that are going to be over or under and sew the 'under' ones first. See pictures below.
Ensure that you lock your stitching both at the start and the end of the seam. This is really important because you will be rubbing these strips with a really stiff brush, to 'fluff' them up and you want them to stay put.
Make sure
that there is sufficient overlap so that no gaps appear in your ‘fluffed’
chenille.
You can use
the chenille strips to create a spiral like I have for the snail’s shell below
And this is
what it looks like with all the blocks sewn together.
Now you are
ready to apply some elbow grease and rub the chenille strips with a really
stiff brush. This takes some effort, but
you end up with lovely, soft, fluffy edges. What kid wouldn’t like to play with the soft
chenille edges.
I used 3" strips to outline the center blocks and then added borders. I did a simple quilt in the ditch on all the blocks and borders. I then outlined the applique shapes with an echo using free motion quilting. I outlined the letters to spell B A B Y on alternate blocks using free motion quilting. A neat way to do this is to print out the individual letters (I had to increase it to 500% in the font I chose) and then cut out the shapes. I then outlined these shapes with an air erasable marker and this gave me a great outline to quilt the alphabets.
And this is what the finished quilt looks like. I think it looks pretty neat!
I hope you've enjoyed this Chenille Tutorial. Don't forget to post up your pictures of your own version of this quilt, I'd love to see them.
Till next time....
Yours in quilting


Lovely, Vani!
ReplyDelete